
How can we help you?
How should I set up my cabinet library?
- Should a folder structure be used?
- Should fittings be assigned?
- What naming convention should be used?
Do I really need to set up the material for each part individually?
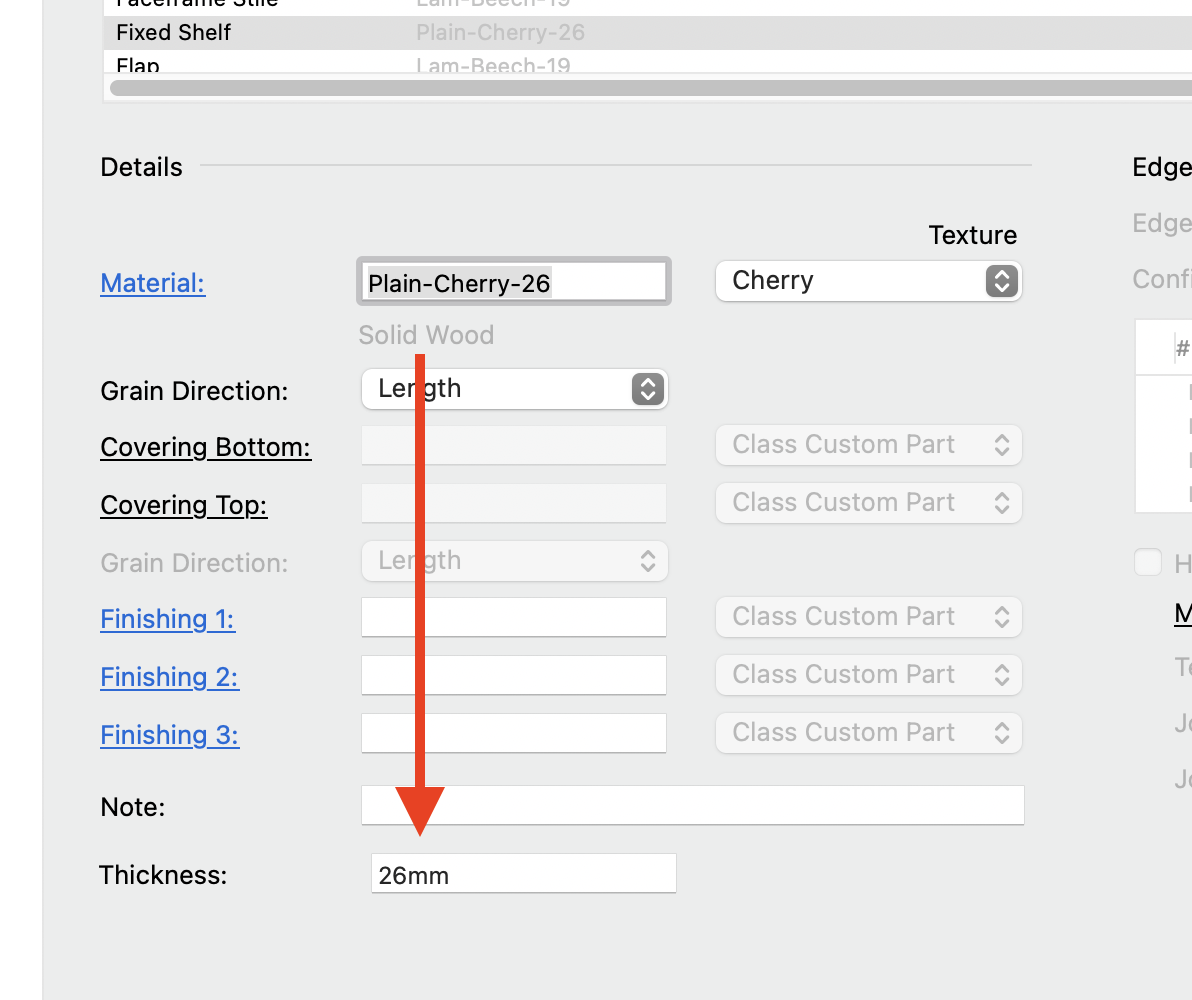
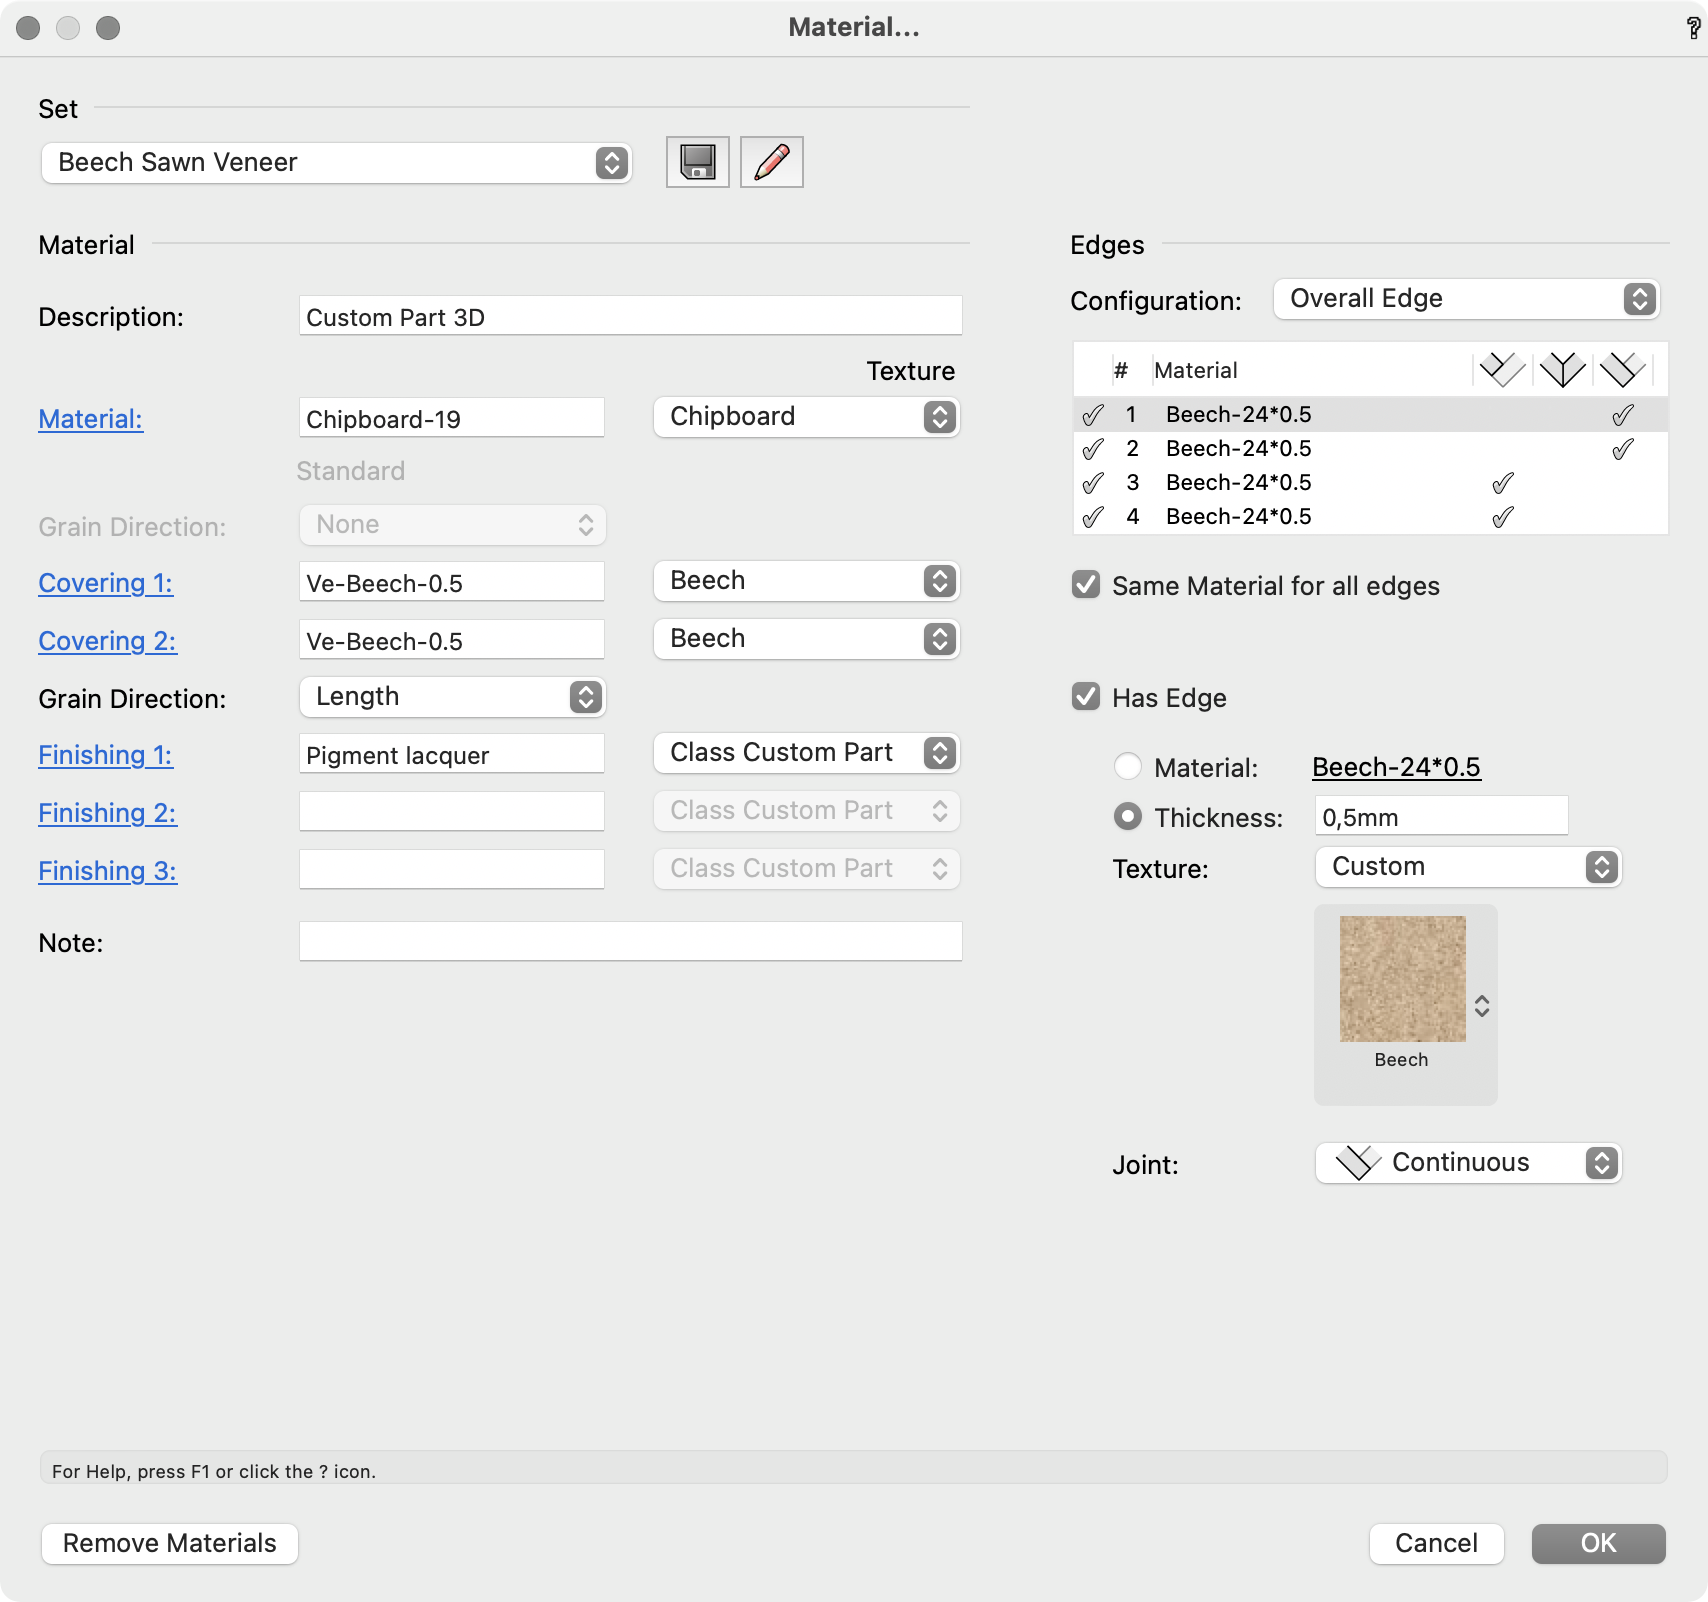
When you try to assign materials to parts of a cabinet object, it is tempting to try and use the link that appears in the edit pane of parts that you activate. Depending on the part, it may look something like this:
While there is nothing wrong with assigning materials via this control, it is not intended for the purpose of assigning a material schedule to a whole cabinet. In order to do that, please go to the ‘Construction’ tab and use a predefined set. Then, make any changes you require and save as a new set.
The link is for one-off material, when you need to override the material schedule for individual parts of the cabinet.
So, say, you have assigned the material schedule ‘Beech Veneer Panel’, as in the above example. Now, you want one individual door of the cabinet to be maple. That’s what the link button is for.
So what if I have assigned an individual material and want to preserve it even if I change the material schedule?

That’s what the ‘Keep custom materials assigned to individual parts’ option is for. If you check it, it will protect individual materials assigned to parts from being overwritten by a change to the general material schedule.
Why do some of my own custom screws change position when a cabinet is reshaped?
When you create your own screws, you must not delete the second drilling. The code that makes sure each screw behaves correctly when a cabinet is reshaped, expects two drillings. If you delete one of them, you may see something like this: figure 1 shows the screws after placement. They are placed correctly. Figure 2 shows the screws’ position after the cabinet has been reshaped. These screws only have one drilling.

But I don’t need two drillings. What do I do?
We have a solution for you. Simply replace the drilling you don’t want with a null machining. You can find it in the interiorcad tool palette:
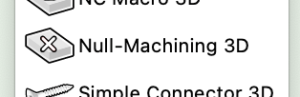
Please make sure you don’t ungroup anything. Enter each group that you encounter inside the screw symbol until you are able to select the drilling you don’t want. Then, delete the screw and place the null machining where the screw was.
Where are the textures for the material database stored?
If you create new materials on the fly, you have probably wondered if there is a better place for the associated textures to be stored than the current document. Although there is nothing wrong with storing textures in a document, it creates problems as soon as you use a material that has a texture associated with it and it can’t find that texture. If you have run into this problem, this FAQ is for you.

If you’re using a material whose texture or textures can’t be found, interiorcad will search your entire Vectorworks- and user-folder (as well as your workgroup folder if you have set one up) for a matching texture.
You can easily avoid unknown textures by following these simple steps.
Before you enter a new material into interiorcad’s material database, create the accompanying textures. A material can have up to three different textures (but usually just one plus the material for the core material, which is likely to already exist). Say you want to enter a new melamin faced board by Egger. Let’s go for Sand Grey Glazed Halifax Oak (H1336 ST37).
Make sure you have a blank document with nothing stored in the Resource Manager.
First, download the texture here. (You can register for free to get the high resolution texture without watermarks)
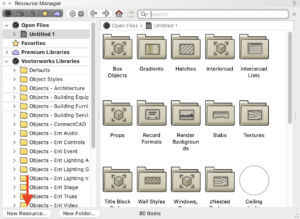
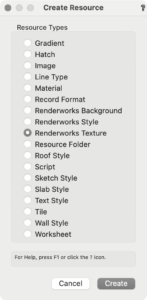
Then, create a new Renderworks texture. In the Resource Manager, click the button ‘New Resource’. From the ‘Create Resource’ dialog, choose ‘Renderworks Texture’.
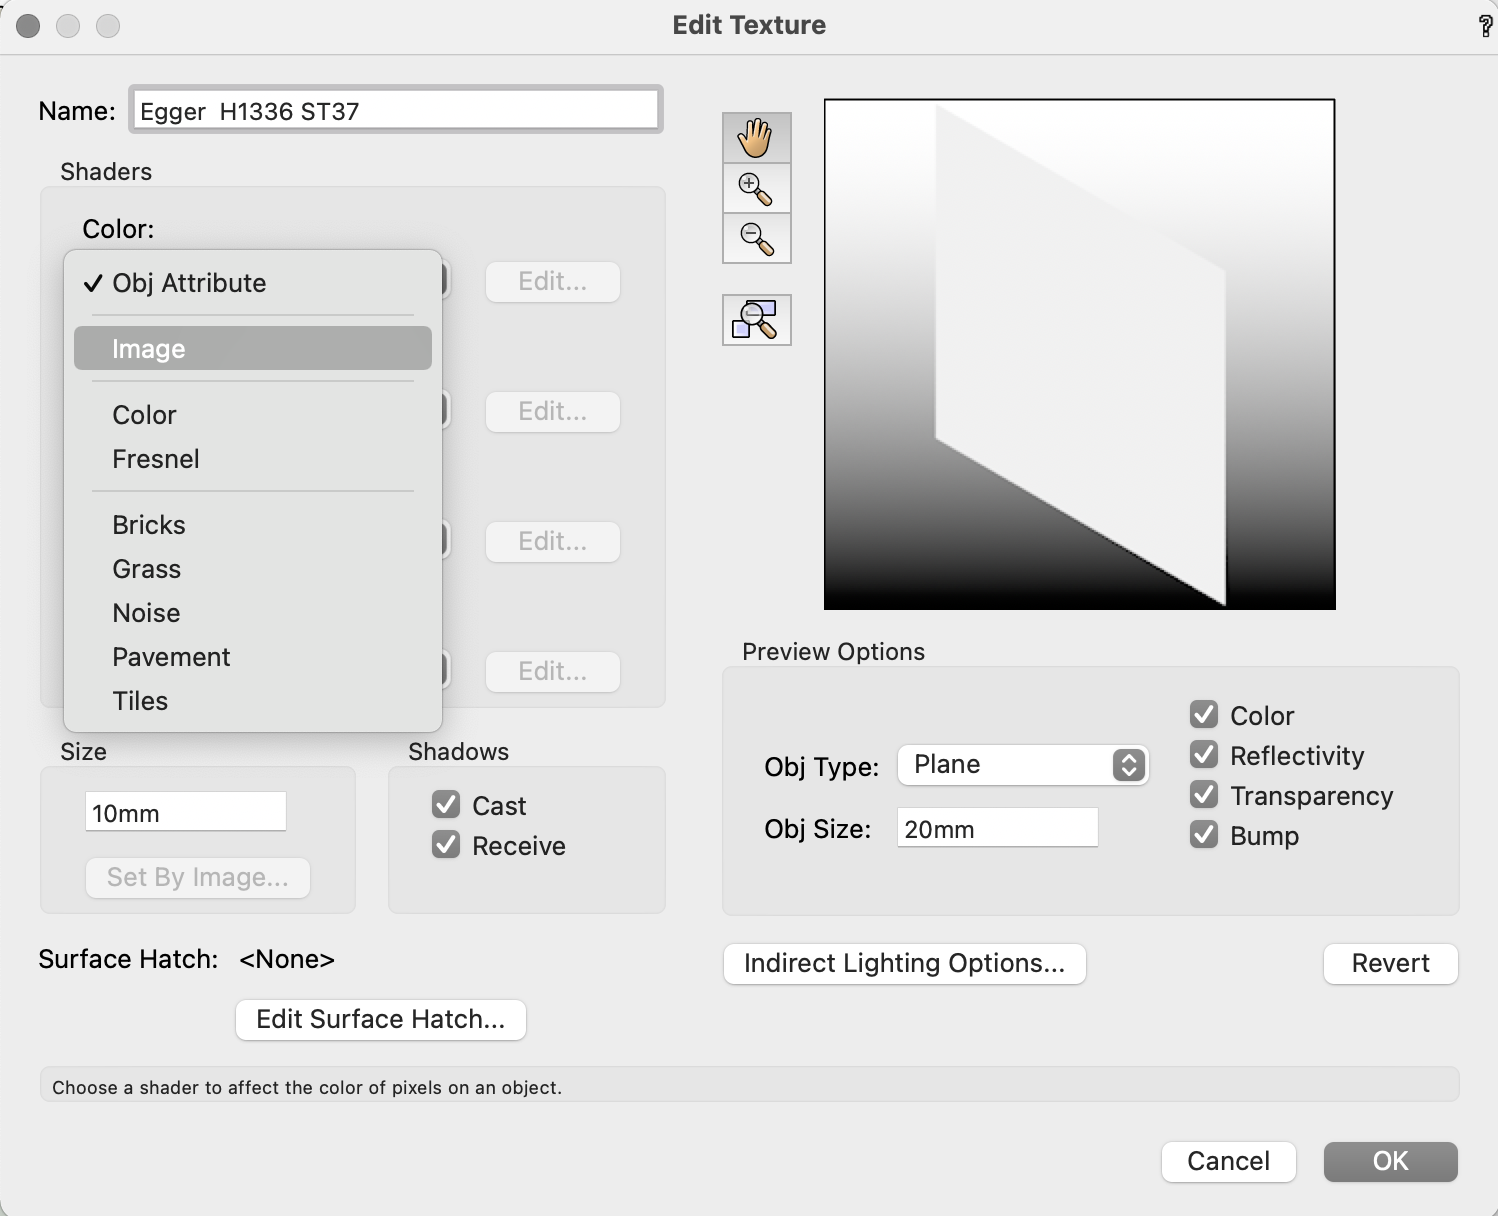
Name the texture ‘Egger H1336 ST37’ and, in the colour channel, choose ‘Image’. Choose ‘Import an Image’ and point to the image you downloaded.
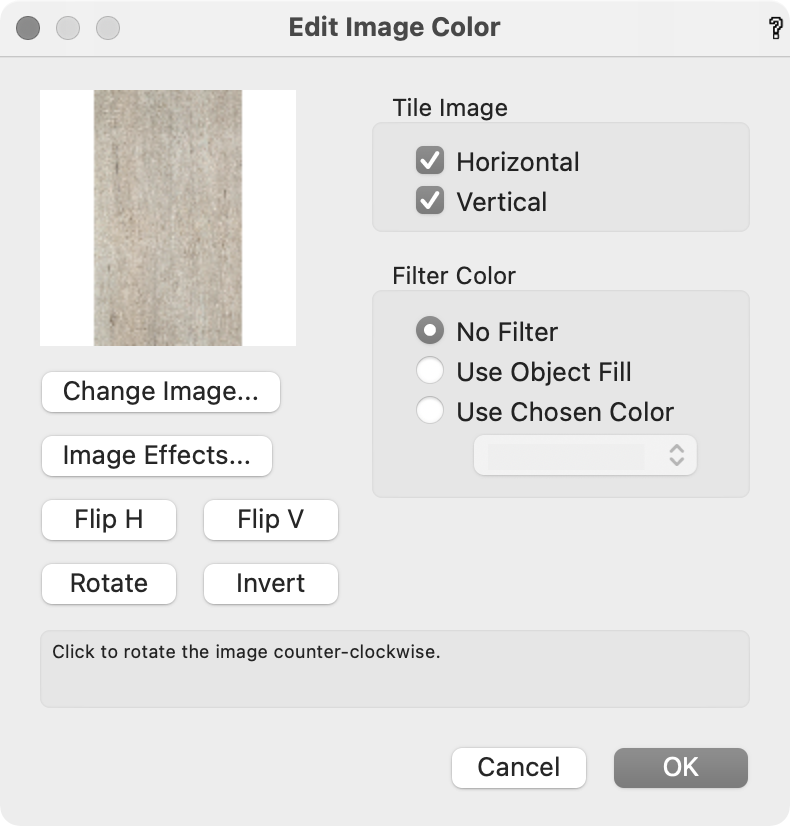
In the ‘Edit Image Color’ dialog, make sure that the texture runs upright. This is the default orientation for textures in interiorcad.
In the ‘Size’ group box, select ‘Set by Image’. Drag the line (it is usually hidden in the bottom left corner) to cover the entire length of the texture. Enter 2800mm for its length.
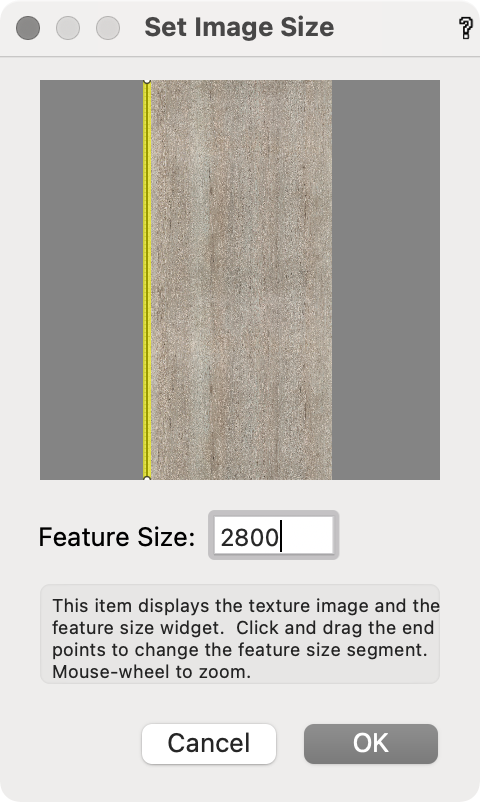
That’s the basics. Now, click OK. The texture has now been saved in the current document:
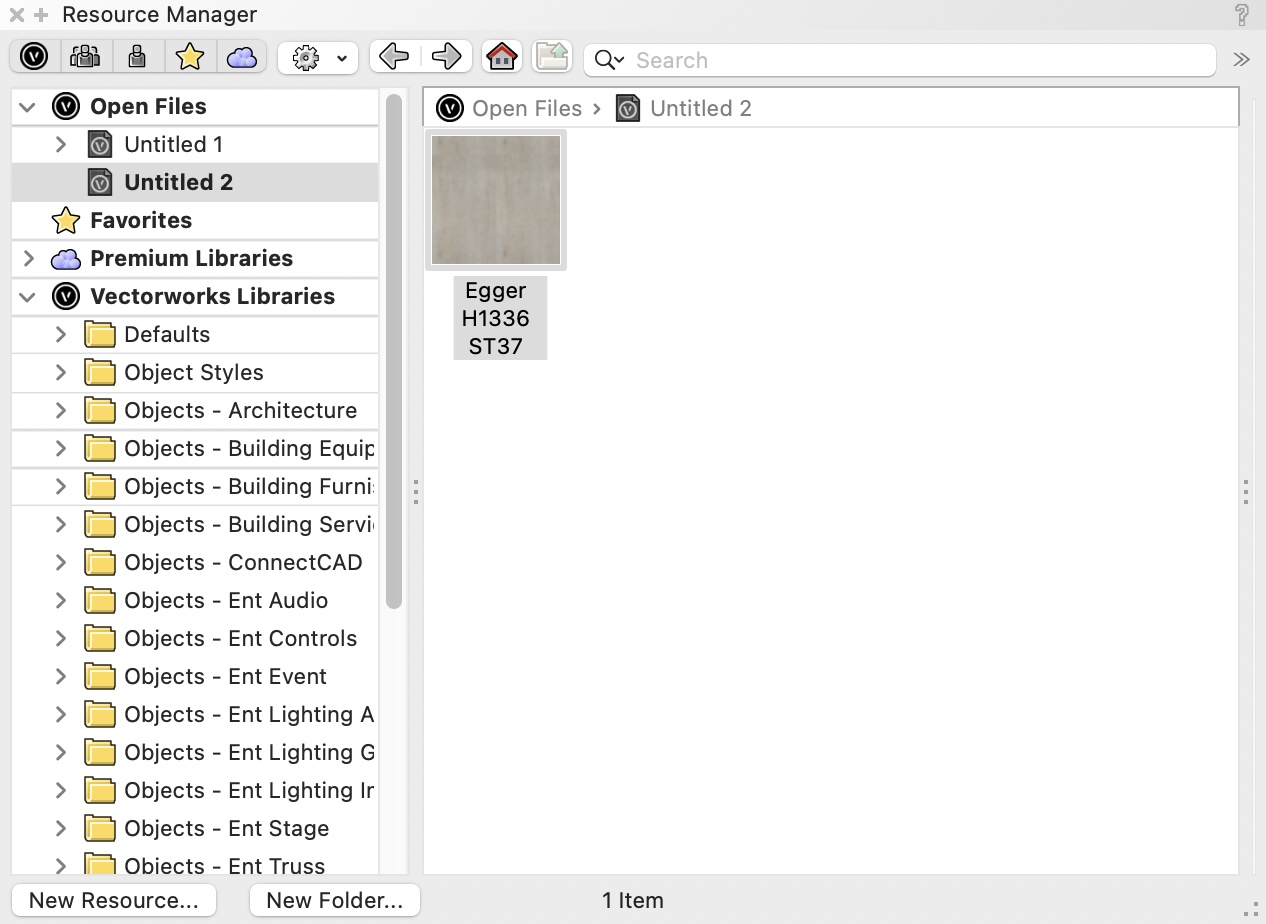
For now, the texture is only available in the current document. So if you want to use this texture with a new material and independently of this document, you need to save it in a directory where interiorcad can find it.
Saving the texture for general use
Choose File → Save.
The file needs to be saved in a folder inside your user folder. If you are on a Mac, point to
/Users/<User>/Library/Application Support/Vectorworks/2021/Libraries/Defaults/Renderworks - Textures
on Windows, point to
C:\Users\<User>\AppData\Roaming\Nemetschek\Vectorworks\2021\Libraries\Defaults\Renderworks - Textures
Make sure you create a new folder there, called ‘interiorcad’ (without the quotes, all lower case).
Save the document. Any name is fine.
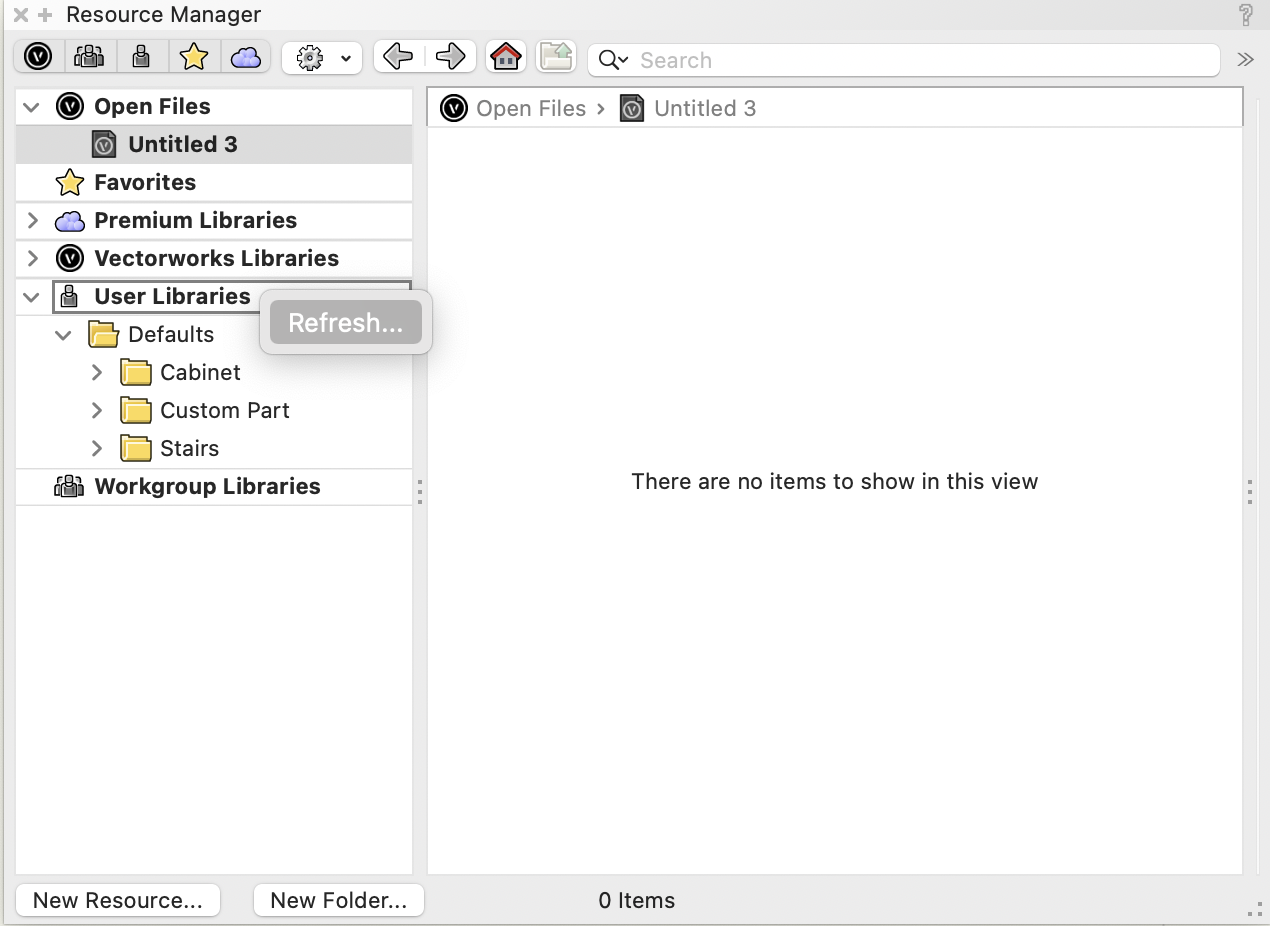
Close the document and open a new blank document.
In the Resource Manager, right-click the User Libraries header and choose ‘Refresh…’
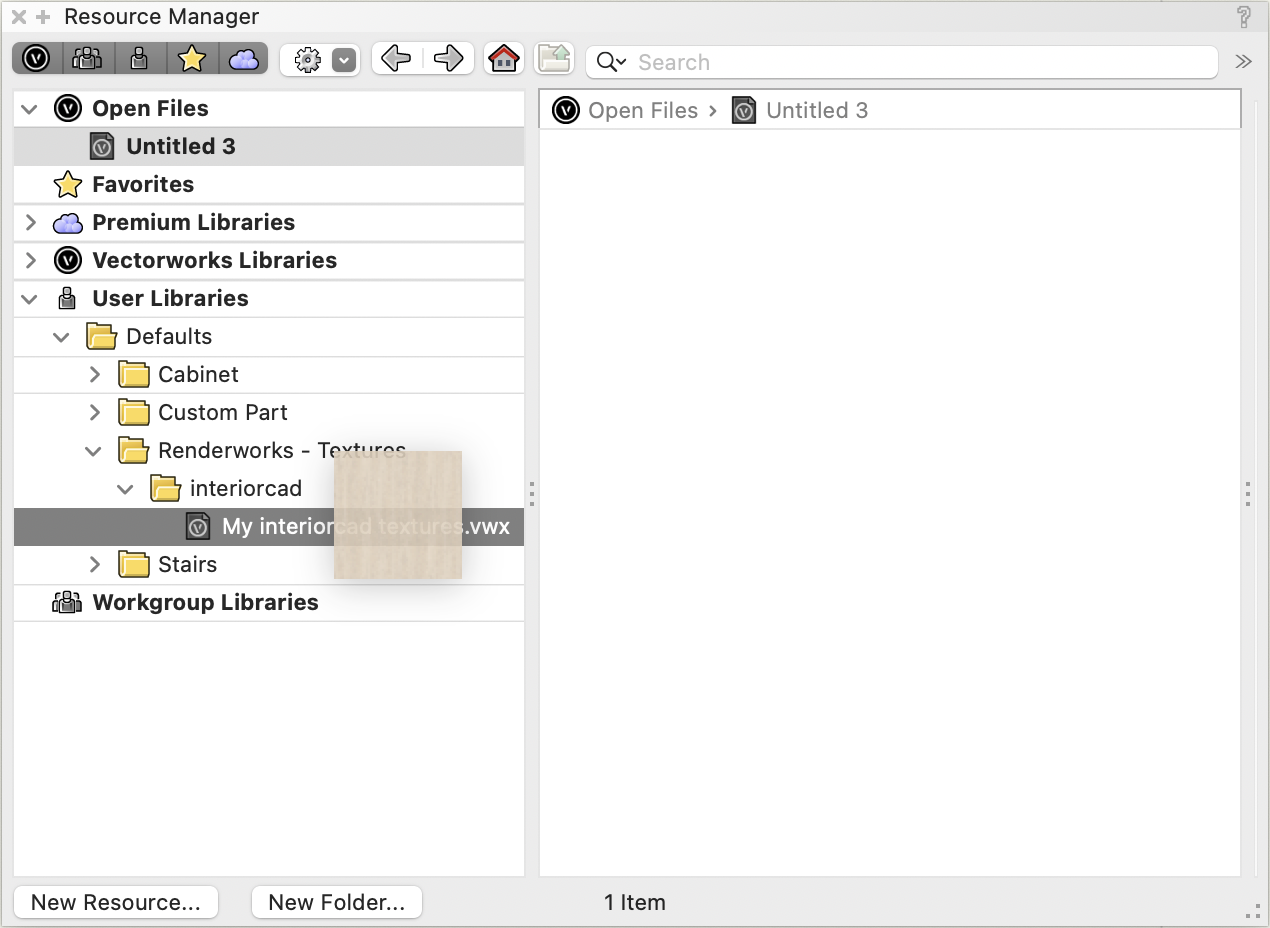
The folder tree will reload and collapse but when you reopen it, you can see the new library document. You can now drag any new texture that you have created onto the file icon.
The next step is to create a material.
Creating a new interiorcad material
We’ll be looking at creating a new board material but the same steps apply to coverings and edge banding materials as well. Choose interiorcad → Master Data → Edit Boards…
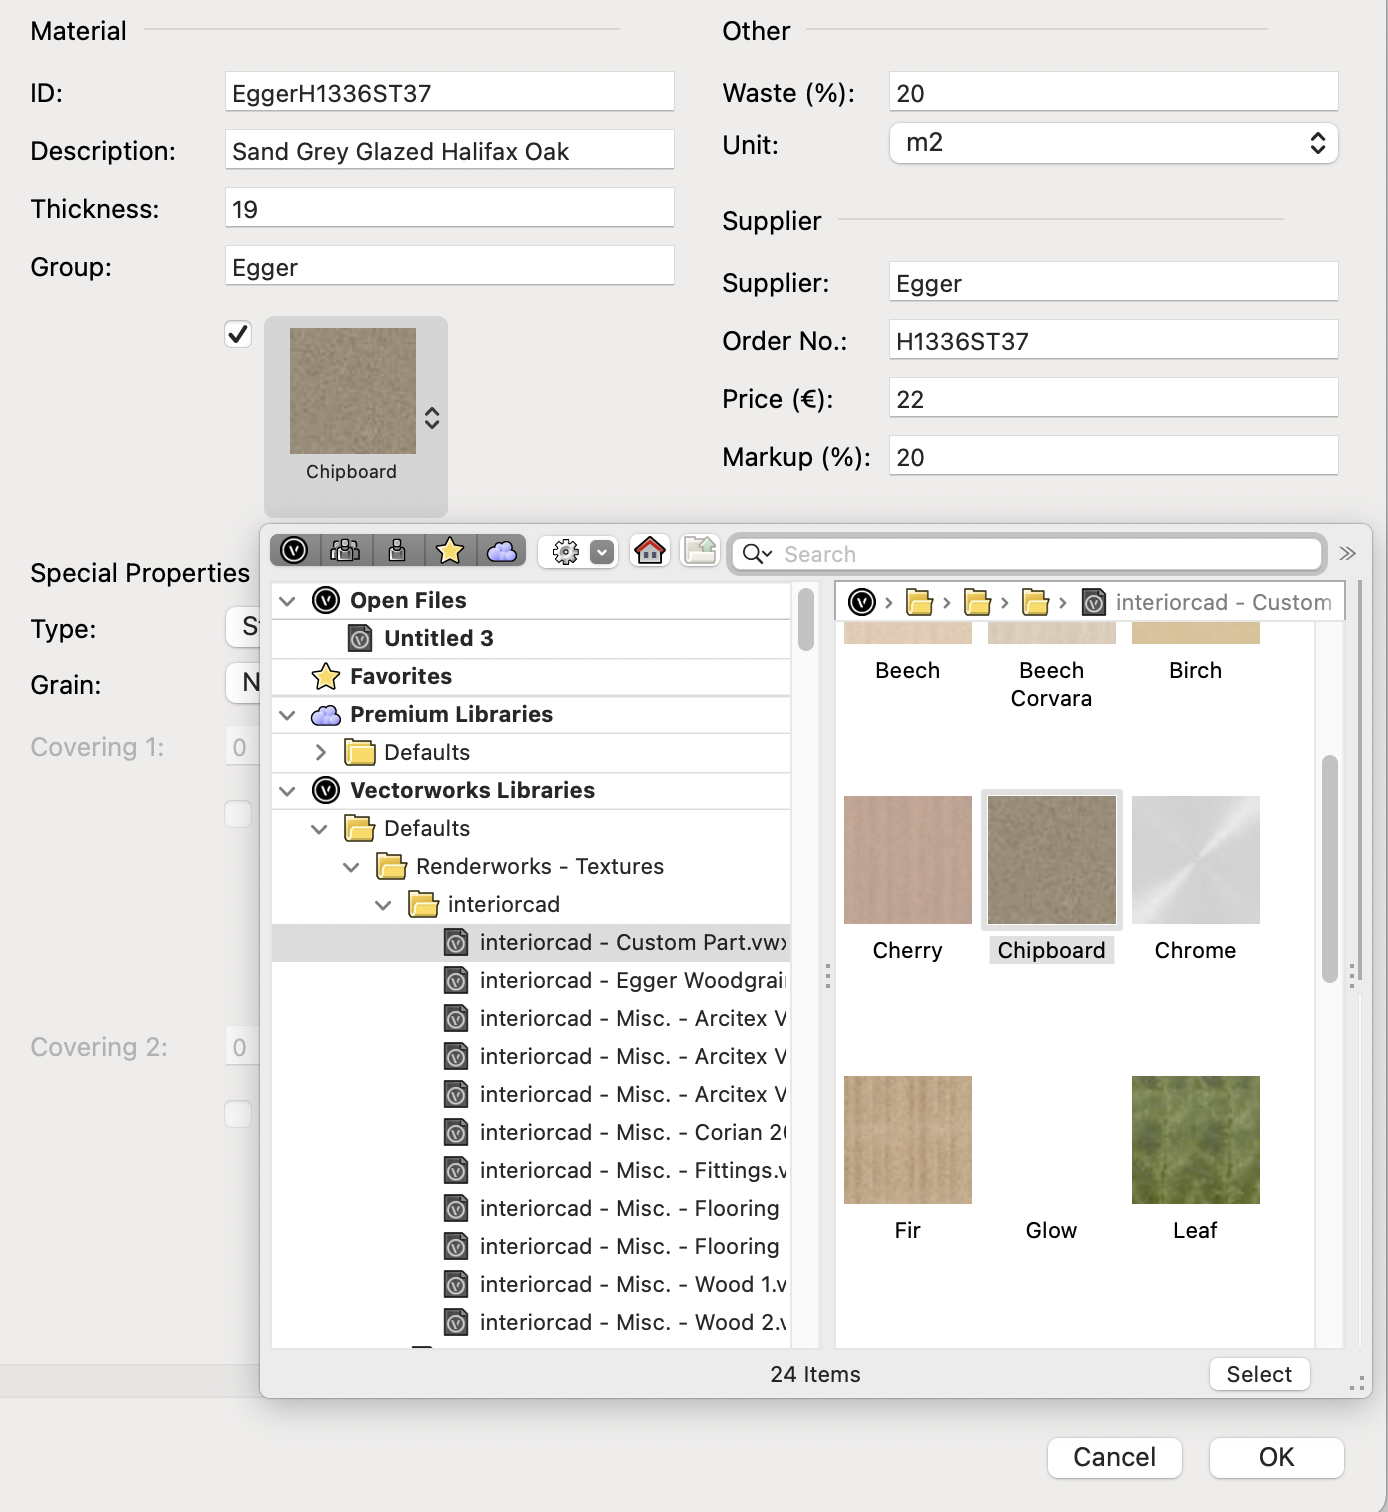
Click ‘Add’ at the bottom left. Populate the right half of the dialog with the new Egger material. Now, let’s set up the textures. We’ll begin with the core material. Since we want a chipboard texture for this, it’s easy. Just choose or search for ‘Chipboard’ in the resource selector (make sure to press enter as this is not a live search field) and assign it to the core material.
Note that his is a pre-supplied texture. It ships with interiorcad as a standard. Hence, it is taken from the application folder. You cannot modify the application folder resources but you can use these resources for your own materials. That is what they are intended for.
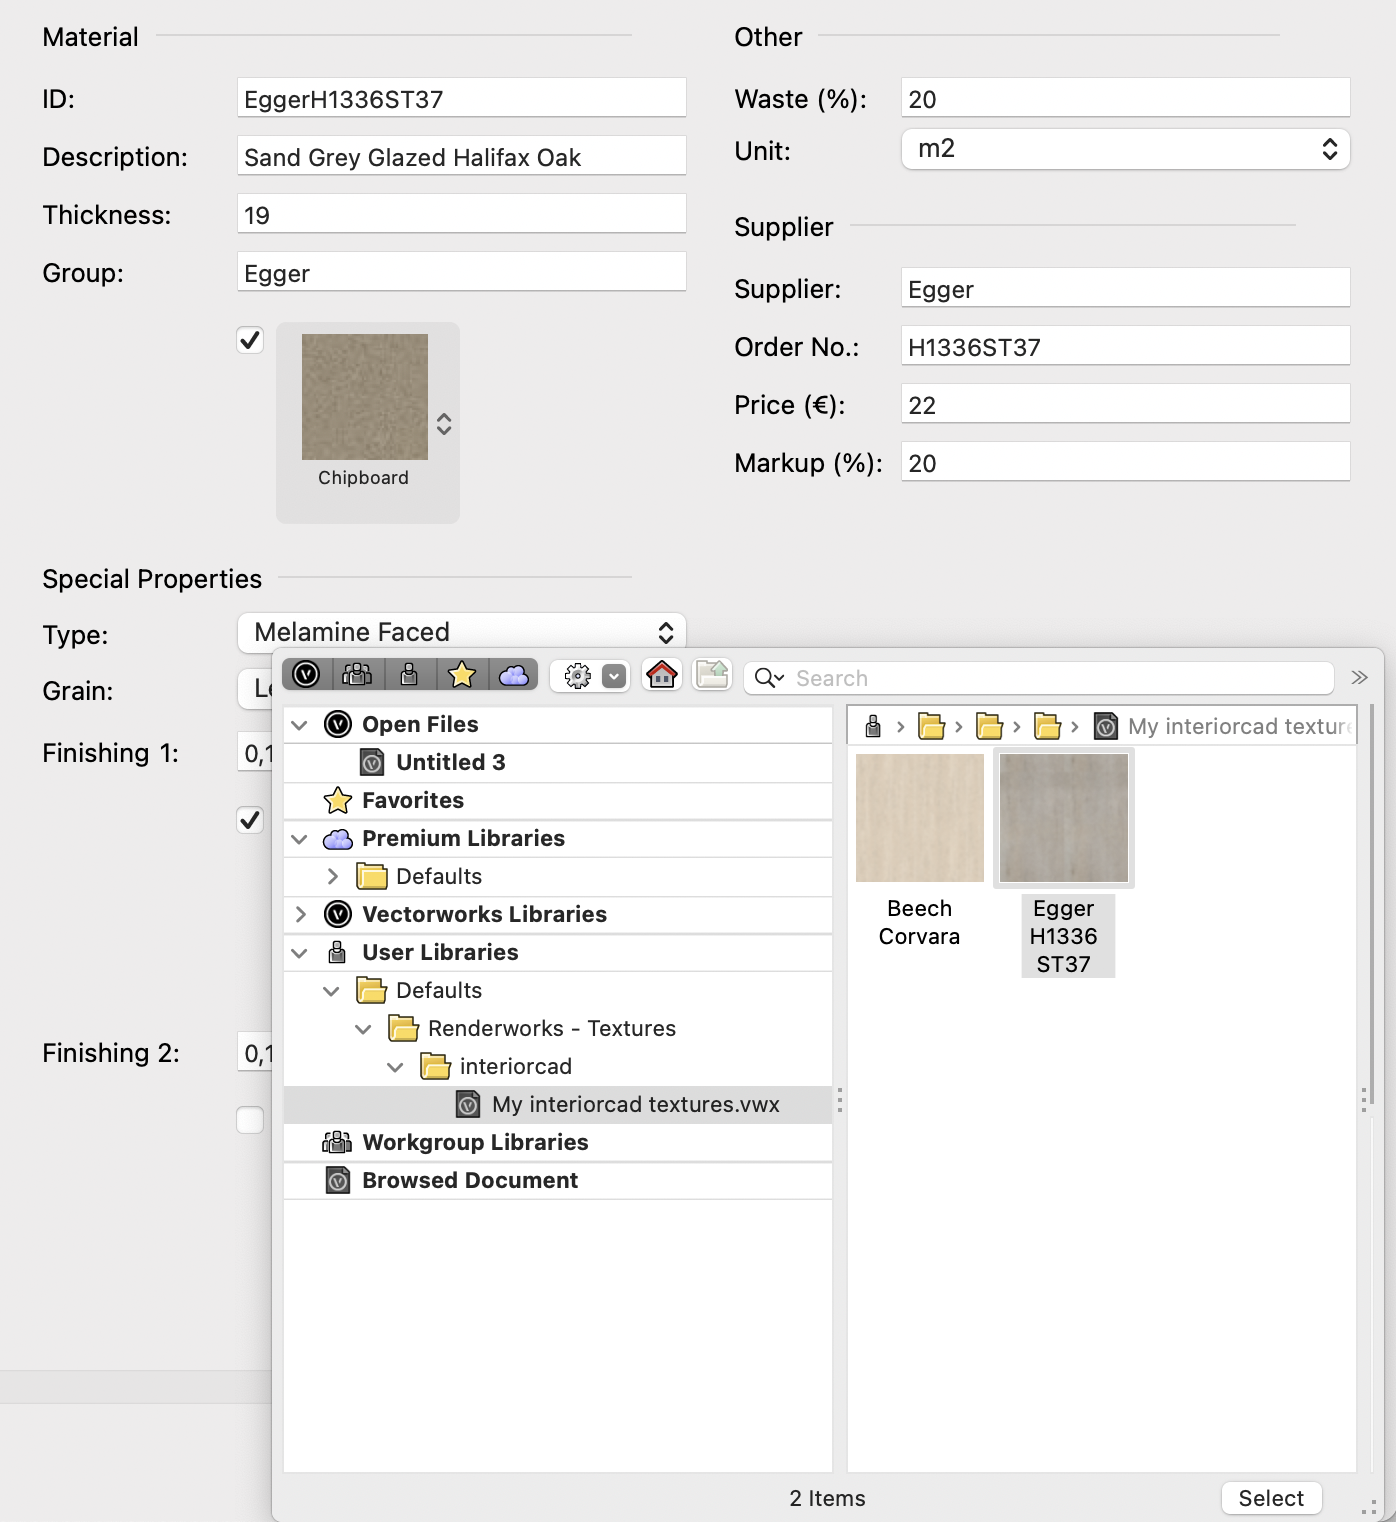
Next, let’s assign the texture to the outside faces of the material. You will notice that the texture selector is disabled. That’s because the material type is still ‘Standard’ We will need to make it ‘Melamin Faced’. Once we have done this, we are allowed to choose a texture. Leave the grain running lengthwise and make sure the thickness is not zero (it is 0.1mm by default, which is fine).
If it looks like the finishing thickness is zero, you may have your decimal precision set too low. Go to File → Document Settings → Units and make sure it’s at least one decimal place .
Now, open the texture selector and navigate to your user libraries. Find your texture document and choose the new Egger texture you just created.
Repeat for the opposite side. That’s it. The new material can now be used from any document. interiorcad remembers where the texture came from and will use it for this material. Once you have used it in a new document, it will be taken from the local document library and not be imported each time you assign the material.
How do I edit the material database and add new materials?
Editing interiorcad’s material database and adding new materials isn’t hard. Follow these steps to build up your own database of materials and forget about texturing and manual parts lists.
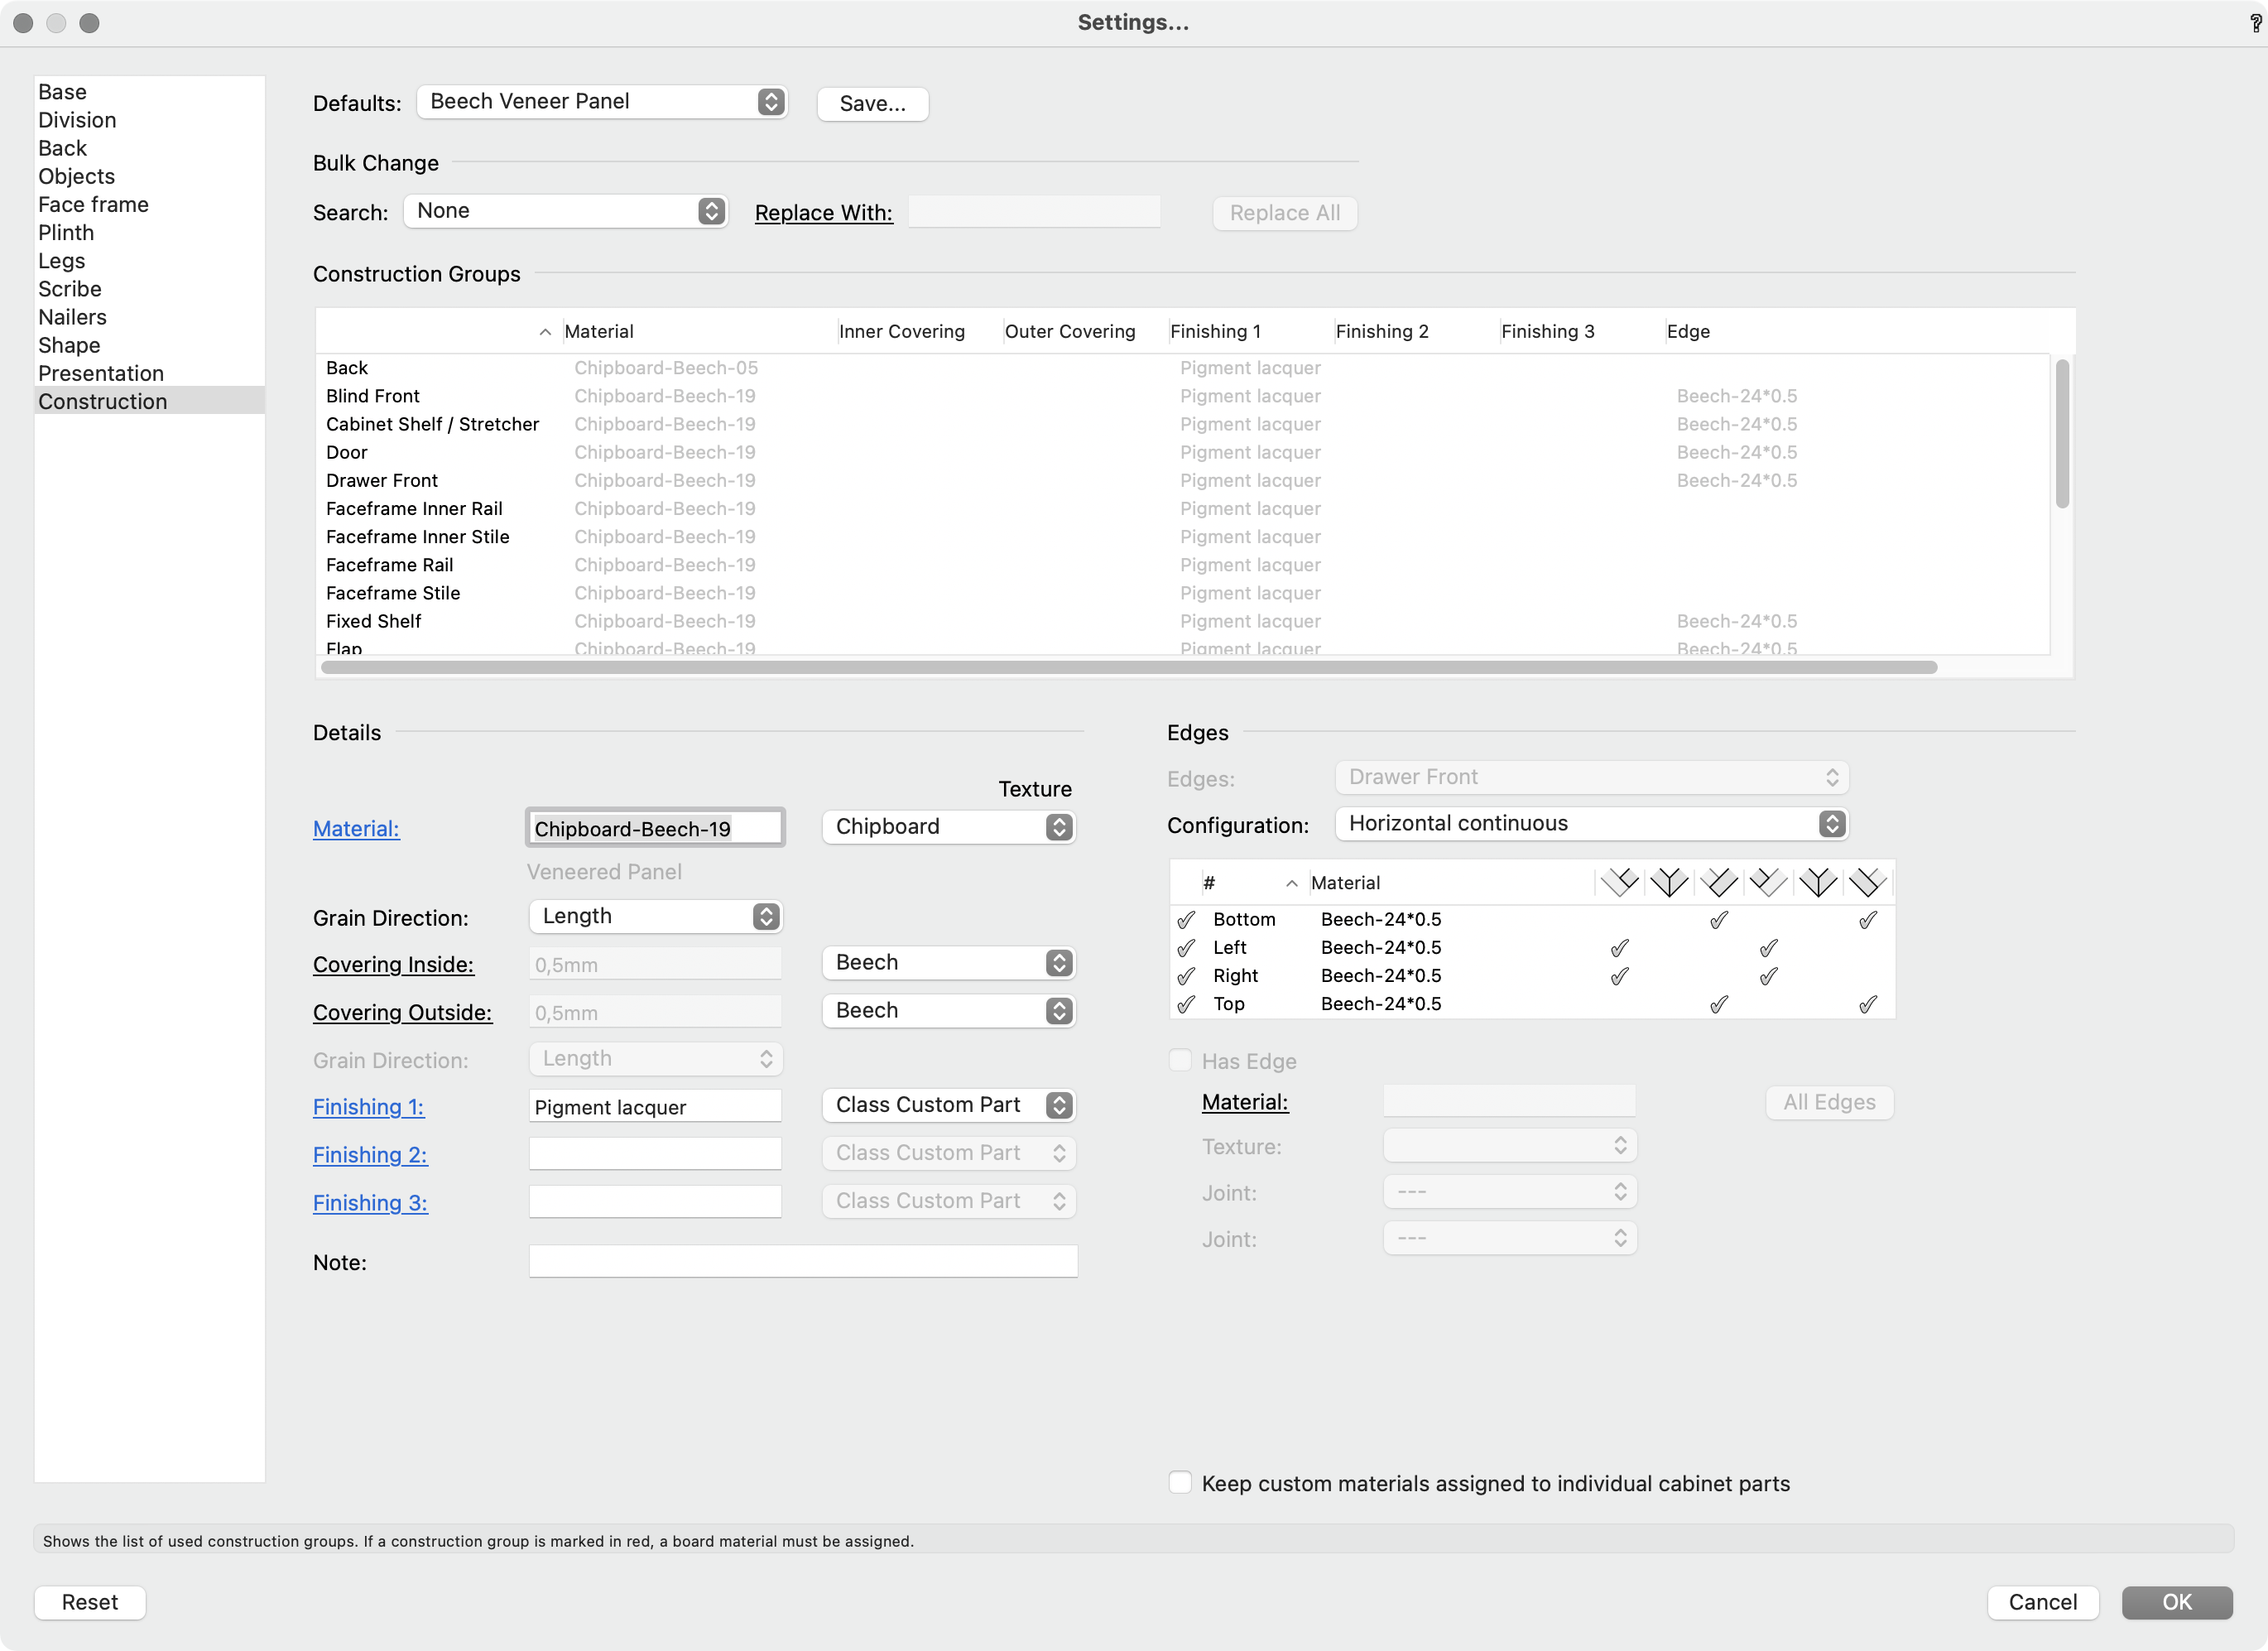
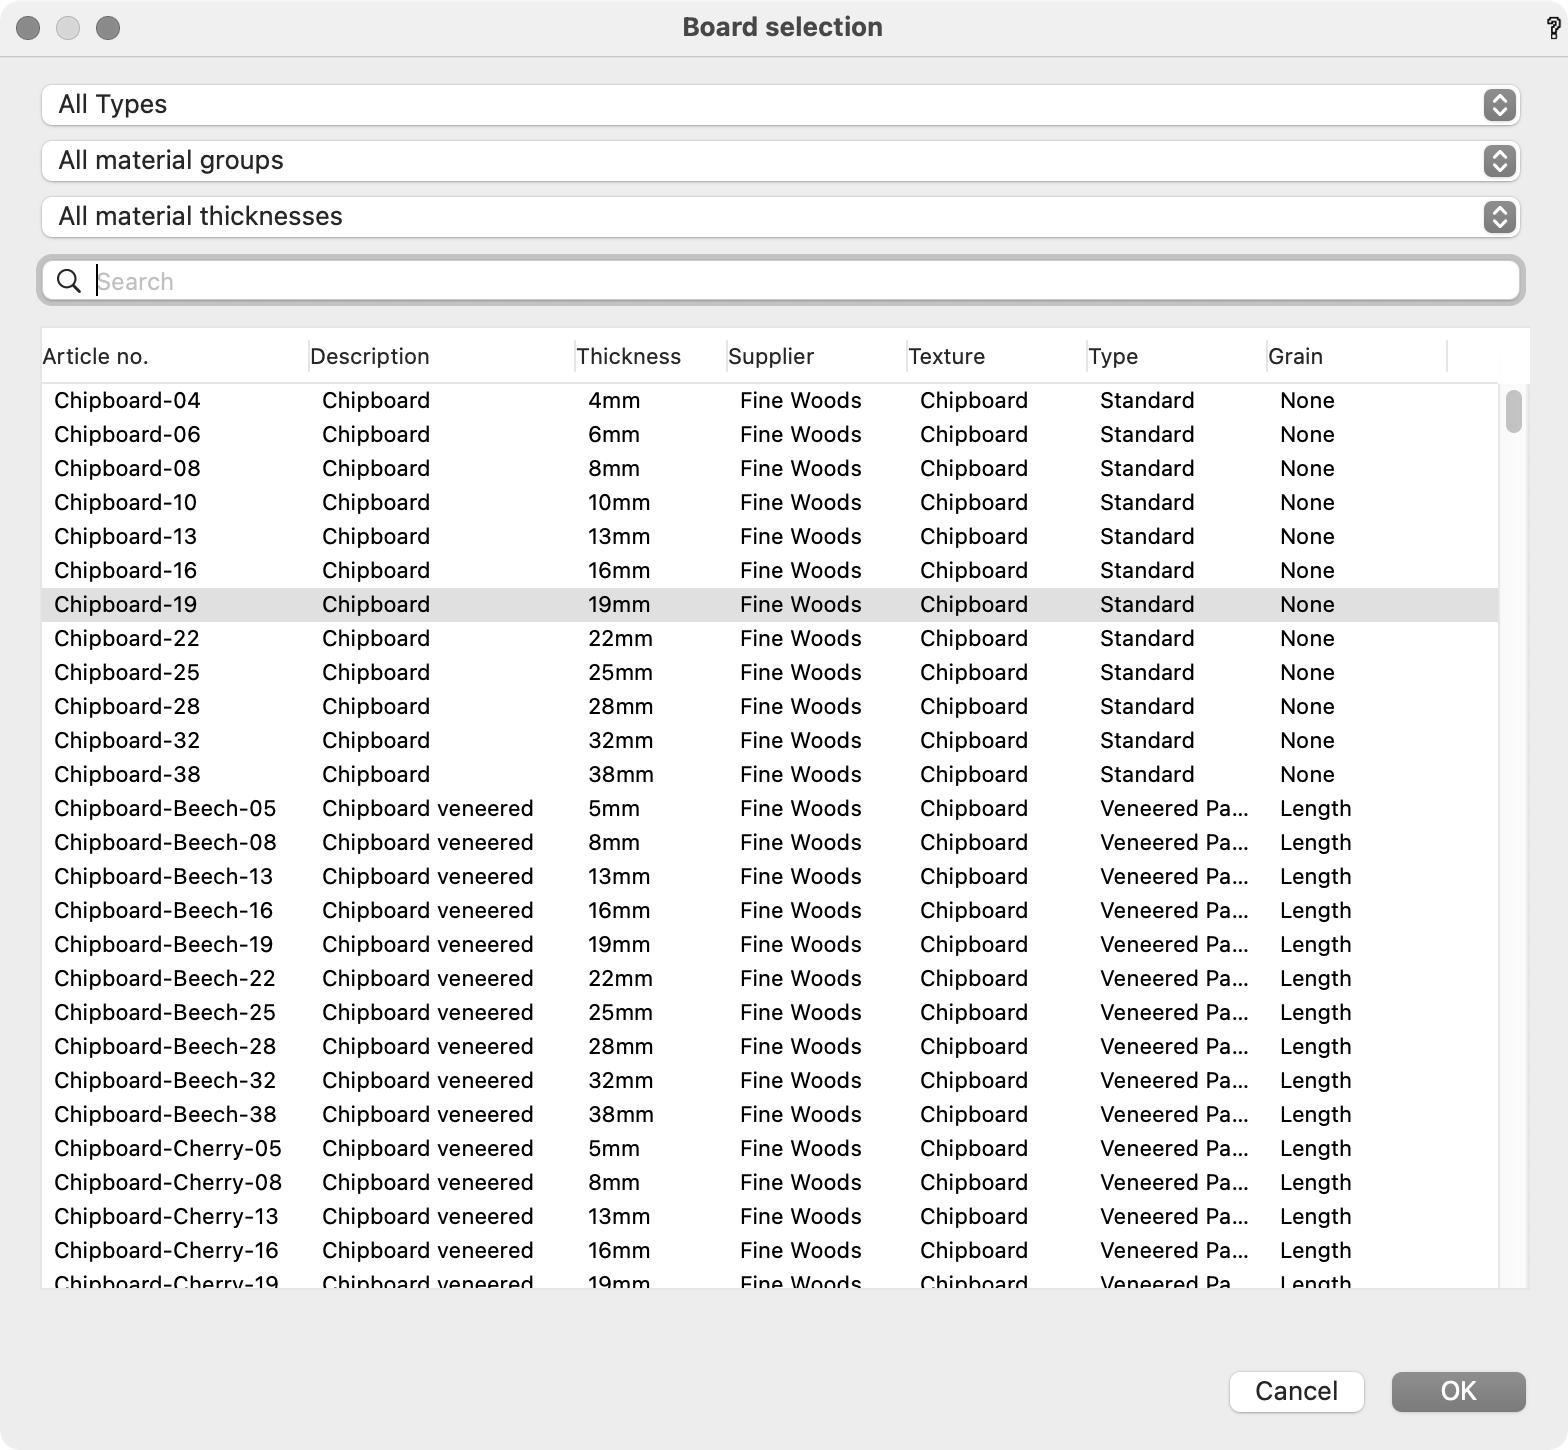
First of all, familiarise yourself with the material dialog. Let’s start with the database of board materials. From the main menu, choose interiorcad → Master Data → Edit Boards…
This will open the Edit Boards dialog. Let’s find Chipboard-Beech-19 and look at the settings for it:
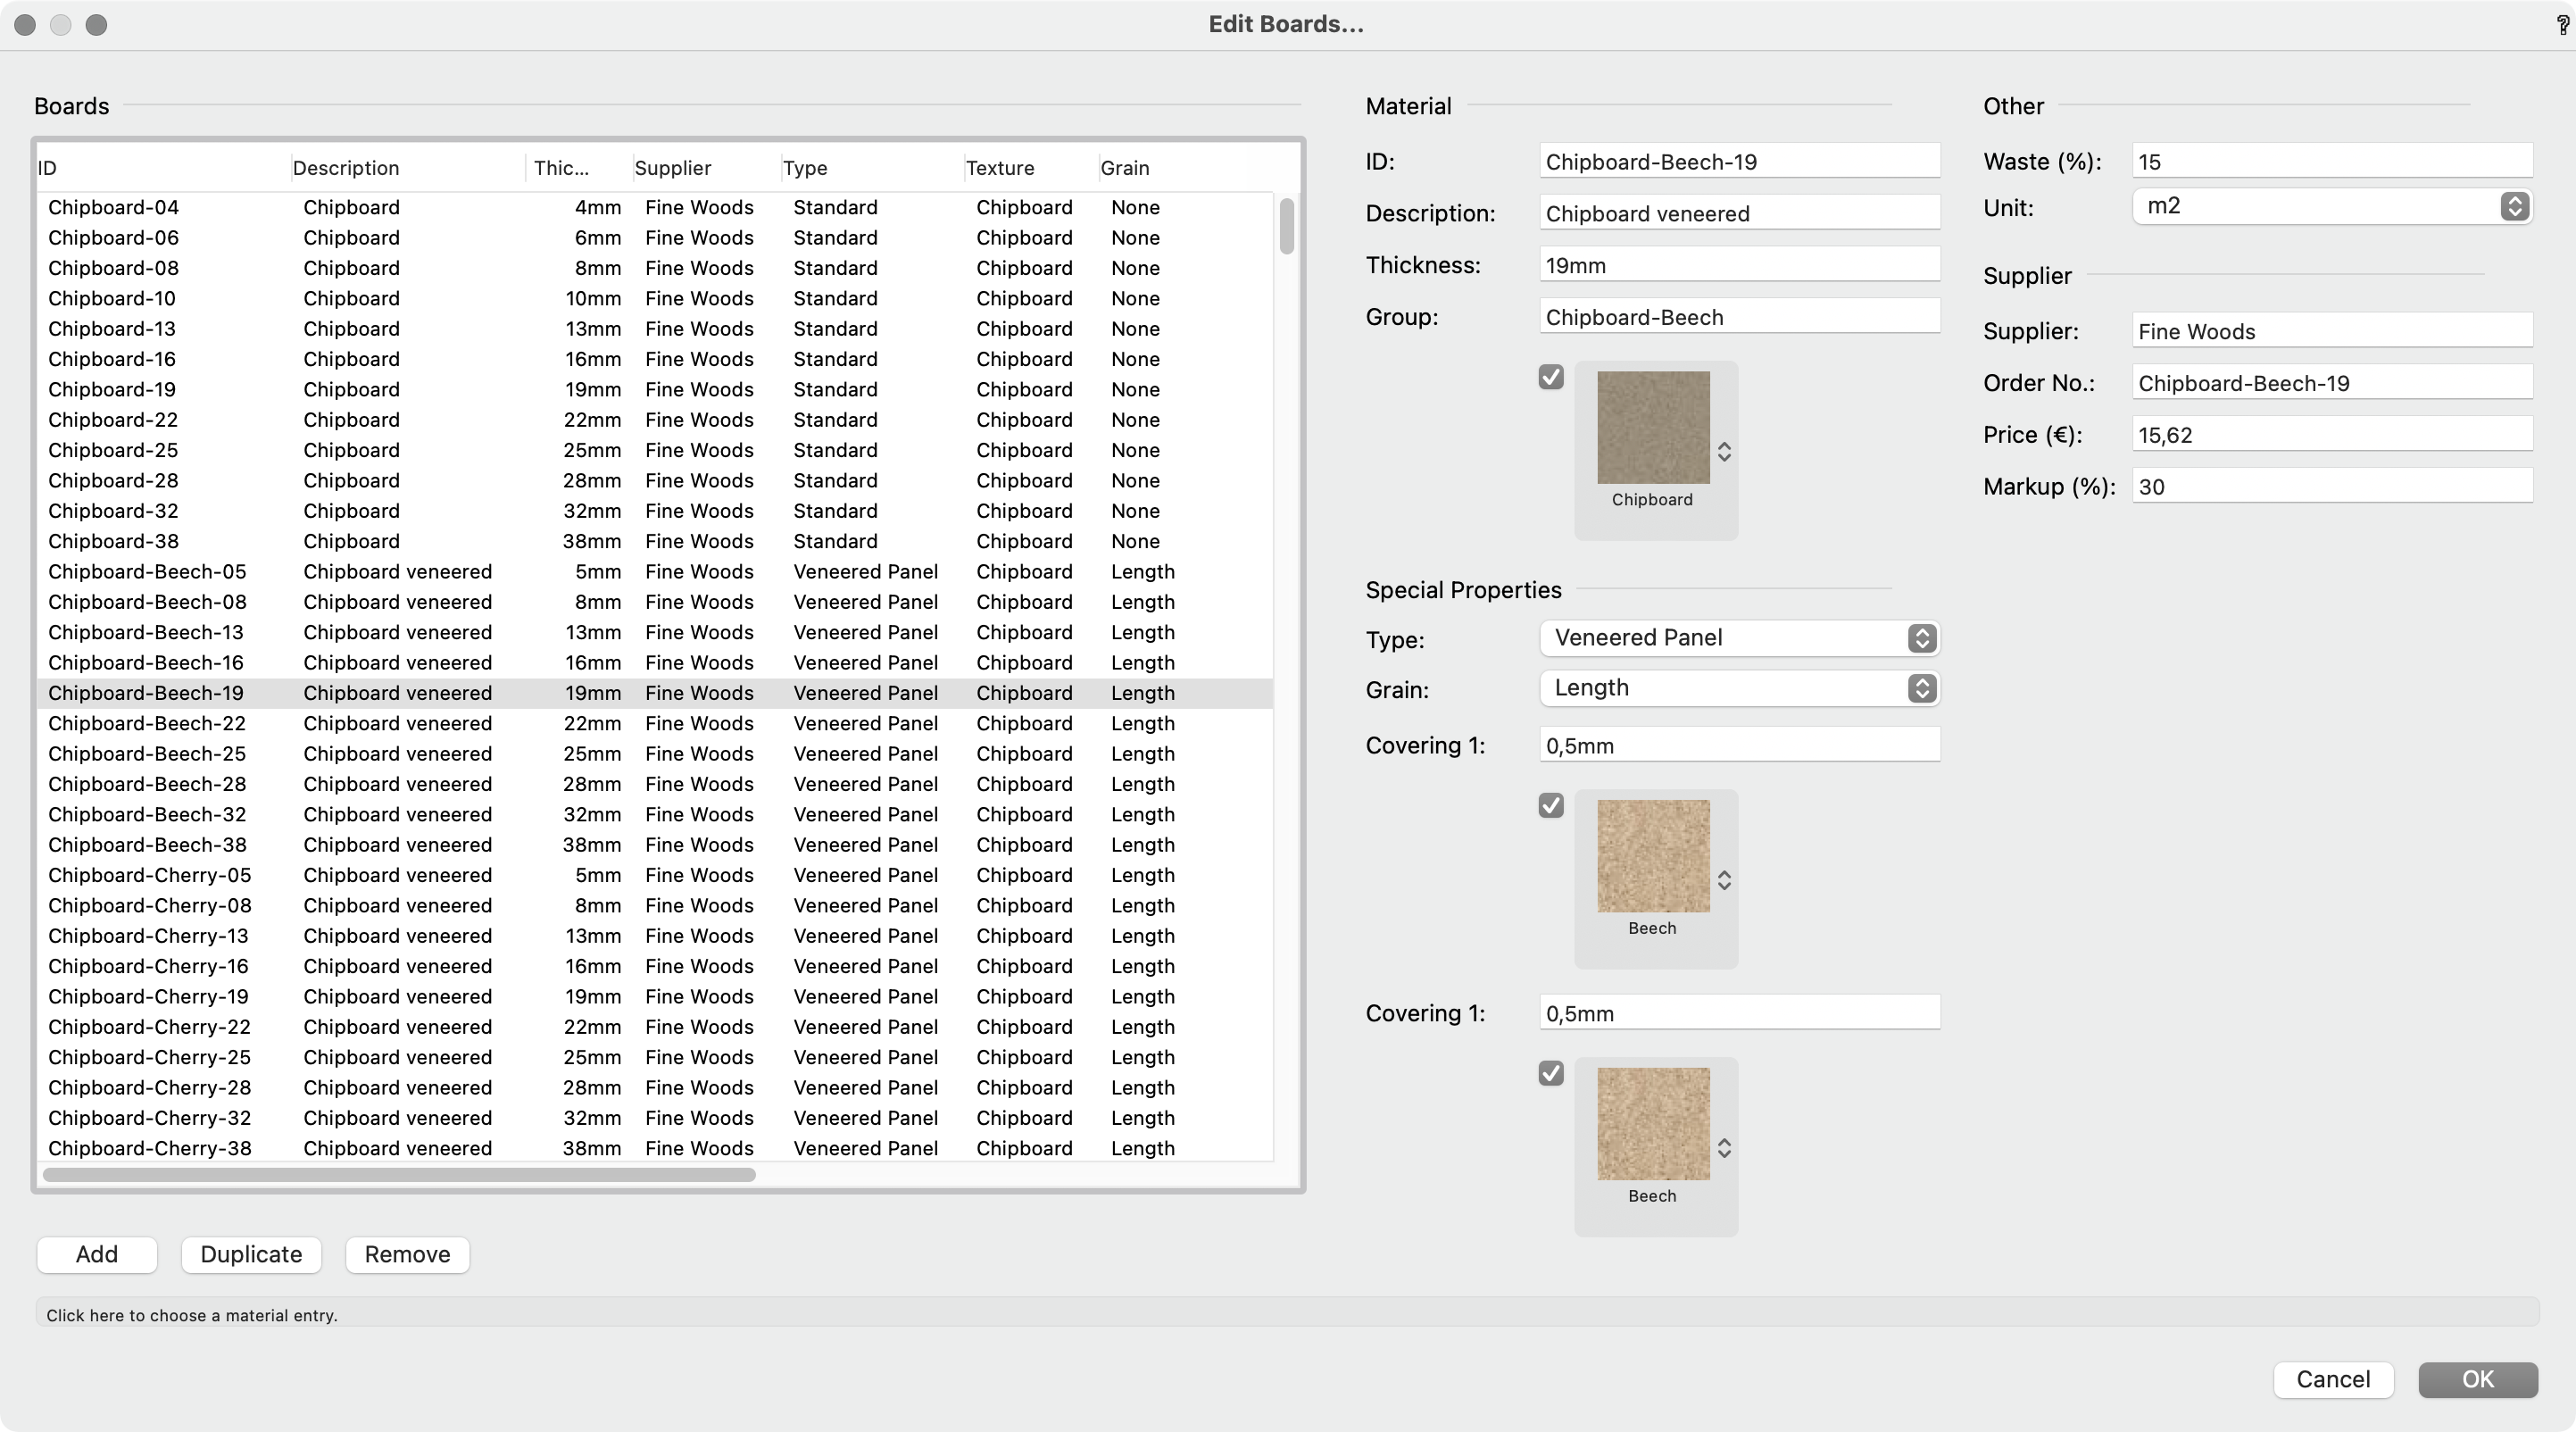
There are seven columns in the list browser. Let’s quickly look at each column:
| ID | What you will find in your cut list |
| Description | A free description. Not included in the cut list but can be added using the placeholder [BoardDescription] . |
| Thickness | The physical thickness of the modelled 3D object that uses the material. |
| Supplier | Used for ordering. Can be added to the cut list using the placeholder [BoardSupplier] . |
| Type | There are seven types of materials with three distinct properties. See below for a detailed explanation. |
| Texture | The Renderworks texture that is mapped to the parts using the material |
| Grain | The grain direction. This will rotate with the Renderworks texture and the part’s dimensions (length ↔ width) |
On the opposite side, you can set up your material to behave correctly, depending on the type of material.
The first parameter you are likely wanting to change is the thickness. Since the presupplied database is converted from German standards, it still has the 19mm thickness that we use over here. So, change it to 18mm or whichever thickness you require.
You can ignore the ‘Group’ input field. It is a legacy field which is still needed for the ‘Classic’ 32bit cabinet but it will soon go away. It may prevent you from saving a newly created material by disabling the OK button. Should this happen, just enter a new text string that has not been used before.
The texture popup lets you choose the Renderworks texture used for the core material. Since we are looking at a veneered board, we need three different textures, one for the core material and one each for each side, which could, in theory, be different). This FAQ explains where to store your textures so thy can be found by interiorcad’s material database.
It is important to know the differences between the material types under ‘Special Properties’. A RAW material such as MDF or chipboard will likely be veneered or covered with HPL or coated. Plus, unless it’s coated, it will most likely receive some form of edge banding. Its thickness is fixed but any covering will be added on. So, if you use an 18mm chipboard sheet and you apply a 0.5mm covering either side, you will end up with a 19mm thick material.
A SOLID material will not be able to receive any kind of covering or edge banding. Its thickness can be set freely in the Object Info Palette or the ‘Construction’ dialog of custom parts or cabinet objects.
FINISHED materials can not be covered separately but can receive textures for the melamin faced layer (or veneer) of material, as well as a thickness. No matter what thickness you choose for the pre-laminated or pre-veneered material, it will not change the finished thickness of the material.
Here is a quick overview of these properties:
| Category | Type | Covering | Edgebd. | Thickn. |
| “Raw” | Standard | |||
| “Solid” | Solid Wood | |||
| Laminated Wood | ||||
| Plywood | ||||
| Glass | ||||
| “Finished” | Melamin Faced | |||
| Veneered Panel |
Finally, you can set the waste percentage, unit and price for each material. It will be used for costing and various lists that interiorcad generates for you.
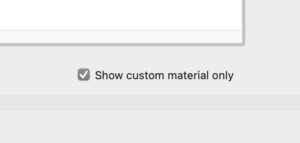
Once you have duplicated and edited a material (or made one from scratch), a checkbox will appear underneath the list to show only custom materials. This makes it much easier for you to manage your own library without seeing all the default materials.
Why do materials have strange thicknesses?
interiorcad and interior xs come with a large database of materials, ready for use. Renderworks textures are mapped to each material so, setting the material of a custom part or entire cabinet also sets the textures for rendering. Since each material also sets the thickness of the board (and the amount of waste and the price for costing), you may not find the 19mm preset thickness right for your own use. If you’re an interior xs user, this should not bother you as this version is mainly intended for designing and rendering. If you are using interiorcad, the full version, head over to this FAQ to learn how to edit the material database, create new materials and adjust the thickness of each material.
Which flavour of Vectorworks works best with interior xs and interiorcad?
It’s up to you, really. Both versions are designed to run flawlessly on both the Fundamentals version of Vectorworks as well as the full-featured Vectorworks Architect. If you’re an interior designer, you’ll be better off with Architect, as you will be needing walls, windows, storeys, doors etc. If you’re mainly concerned with construction drawings, manufacturing documents and, generally, the production side, Fundamentals may be ok for you. But bear in mind: If you need to create sections or interior elevations, you need Architect!
Why are my millings visible in hidden line (and sections)?
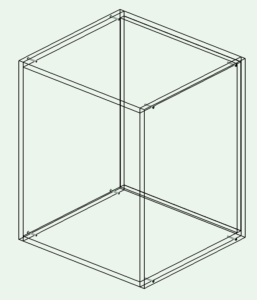
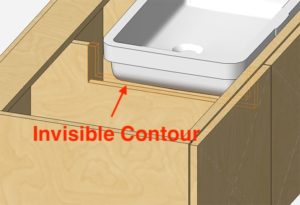
interiorcad millings such as drillings, contour routings and dados are hidden by default via their class. Each milling has its own class and all attributes are governed by the class it’s been auto-assigned to: line thickness is zero and the texture (‘NC-Transparent’) has 100% transparency. This ensures that these custom millings don’t get in the way visually but can still be selected. You can just about see the selection highlighting in the image below:
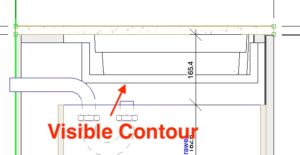
So, why are these millings still visible in Hidden Line, sections and Renderworks rendered viewports?
Hidden Line does not support texture transparency (only ‘none’ fills) and Renderworks, depending on your settings, may still show the transparent object (mostly in the case of miters but also contours):
To get around this, simply hide the class in your viewports. With the viewport selected, find the “Classes…” button in the Object Info Palette. Bring up the Classes dialog and search for “Contour” (or the equivalent milling you want to hide).
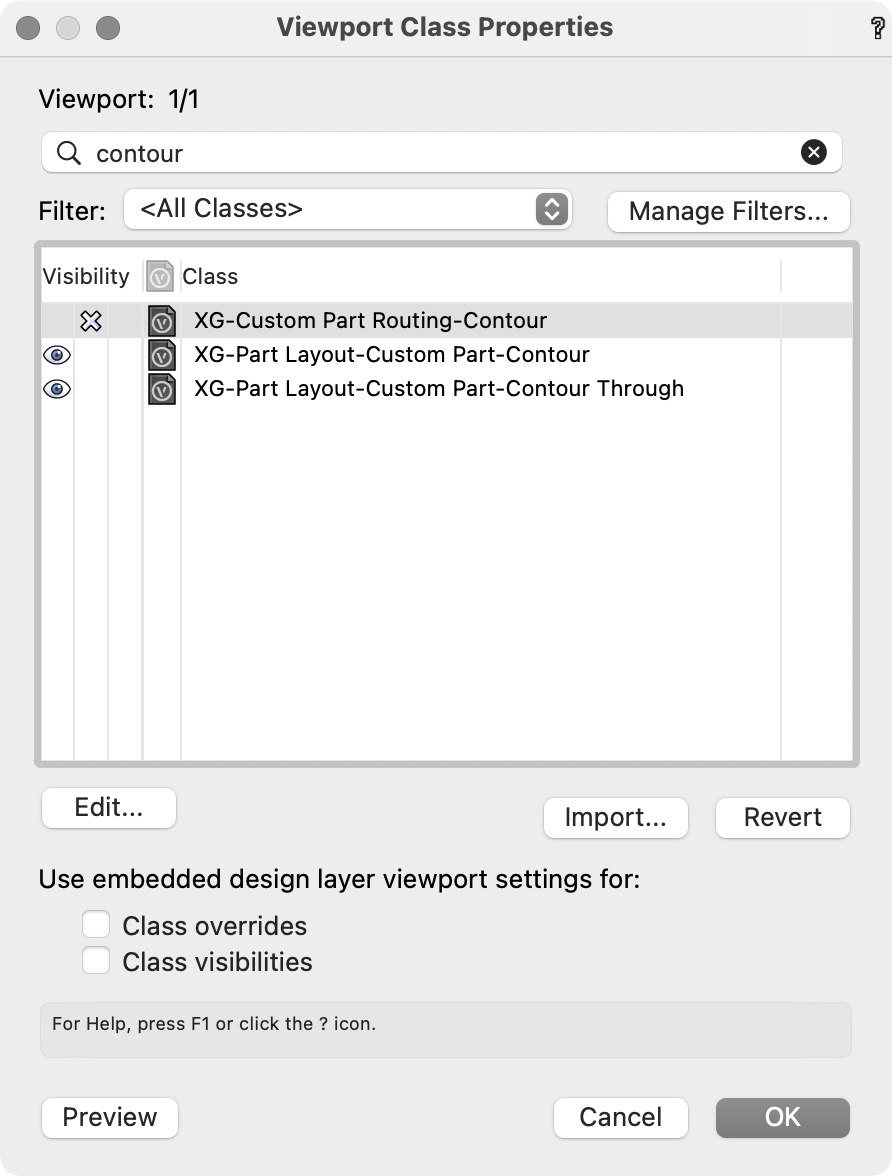
Make sure it’s hidden, confirm the dialog and update your viewport.
The contour should now be gone from your renderings.
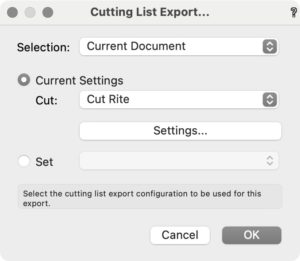
Does interiorcad generate barcodes or QR codes?
interiorcad does not create these codes directly but creates various exports that can be fed into software that runs your label printer, for example Cut Rite or a slew of others. Depending on the format, you may be able to print edgebanding graphics, QR codes or formatted lists from the exported list.
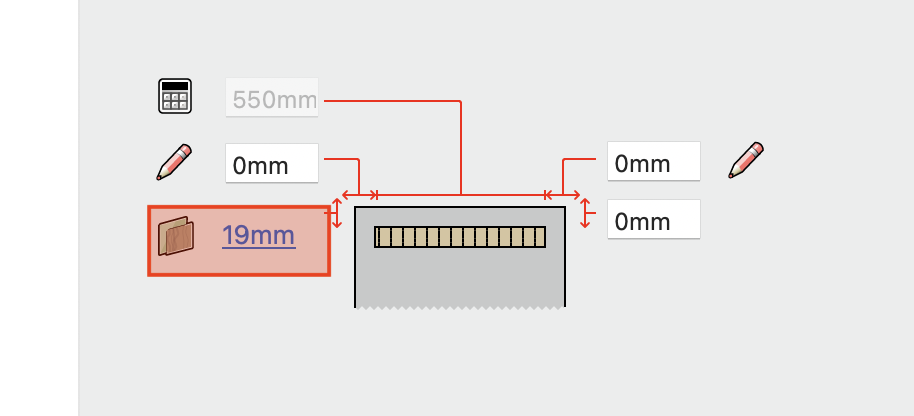
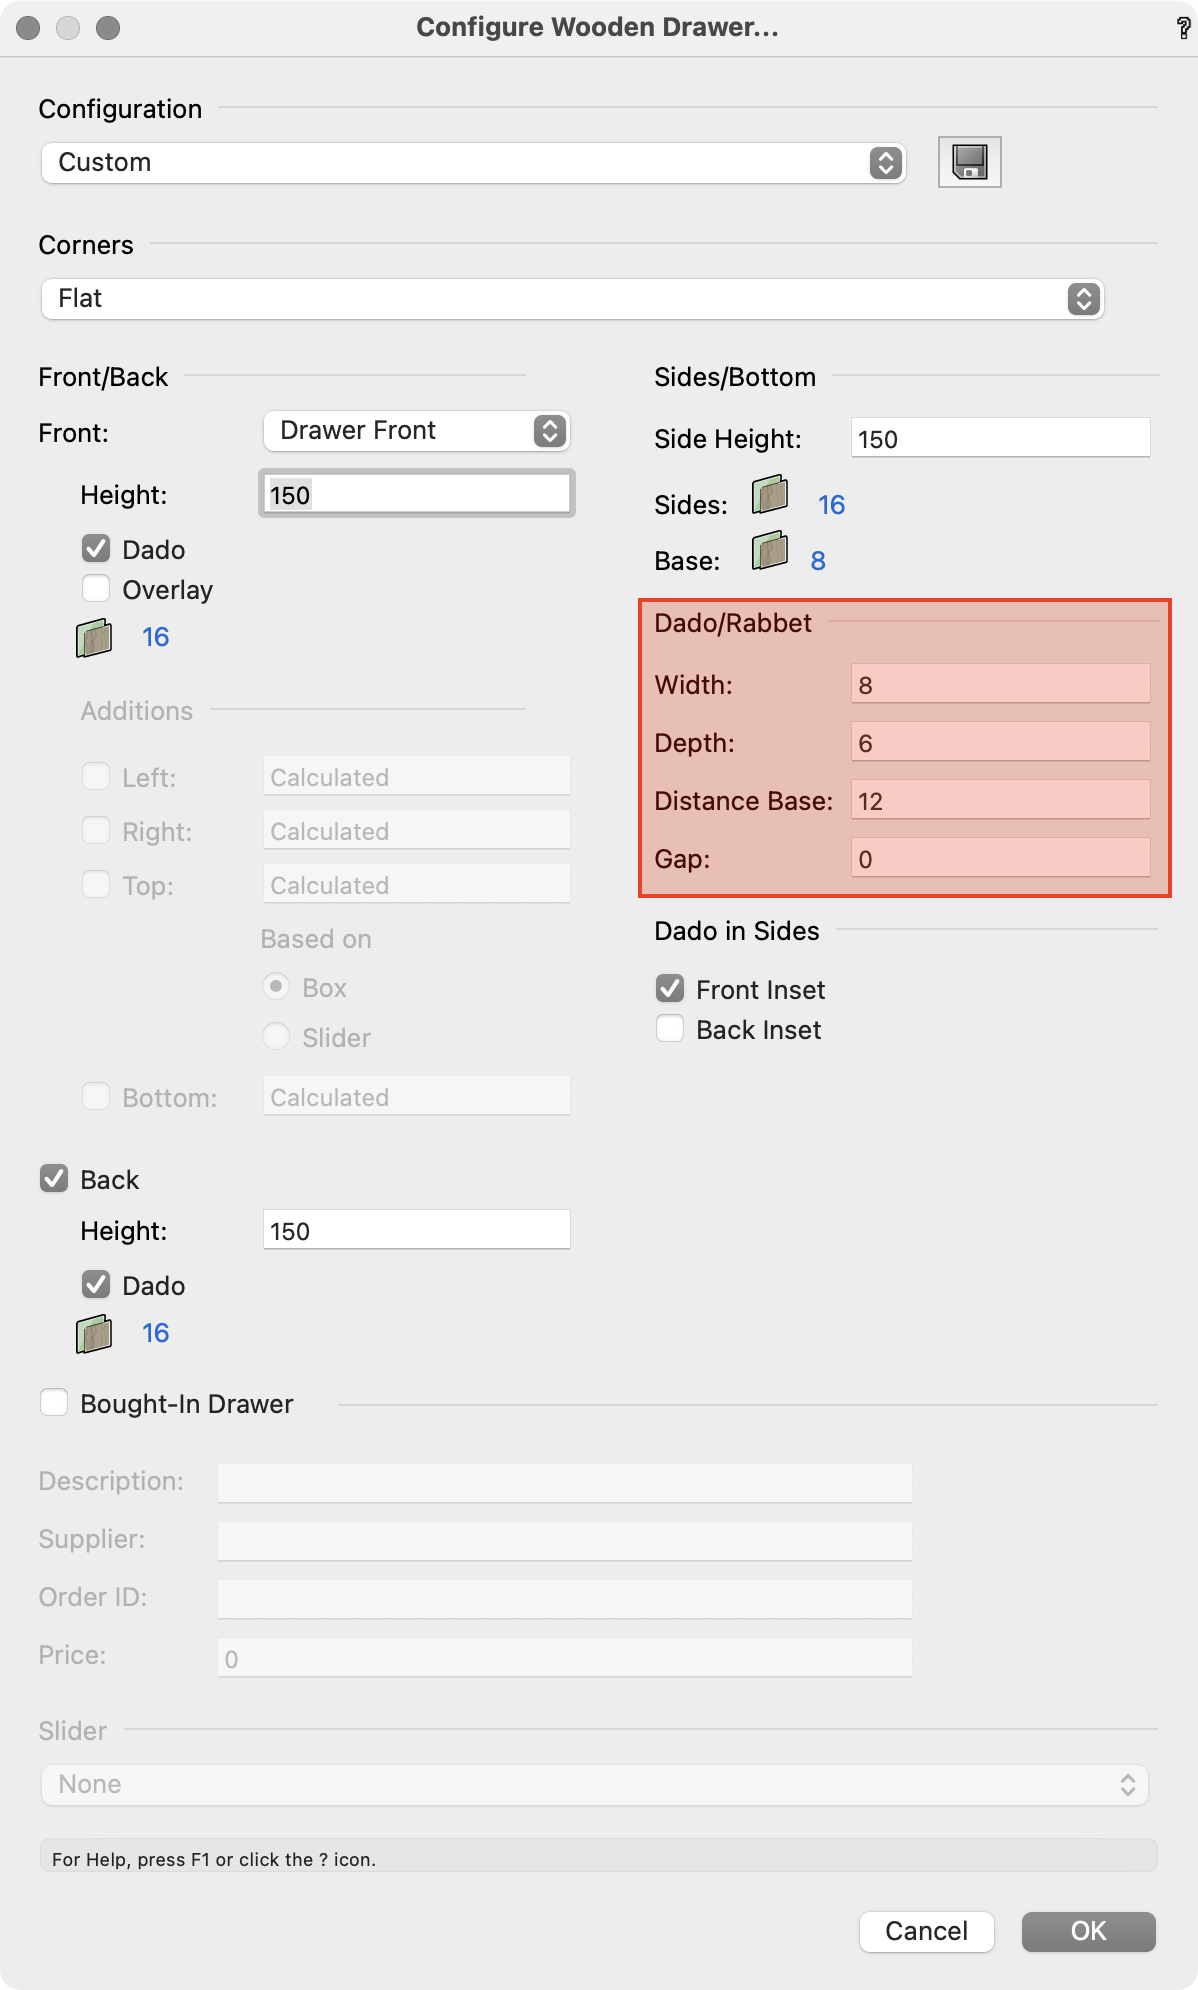
Certain drawer slides are not available for selection
Sometimes, drawer slides are missing from the select menu or -dialog. It could be Tandem or Movento slides but also others.
This is most often the case with customised drawer boxes. Make sure the values framed in Fig.1 are within the manufacturer’s spec for the type of drawer slide you are trying to use.
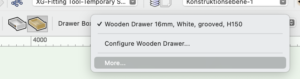
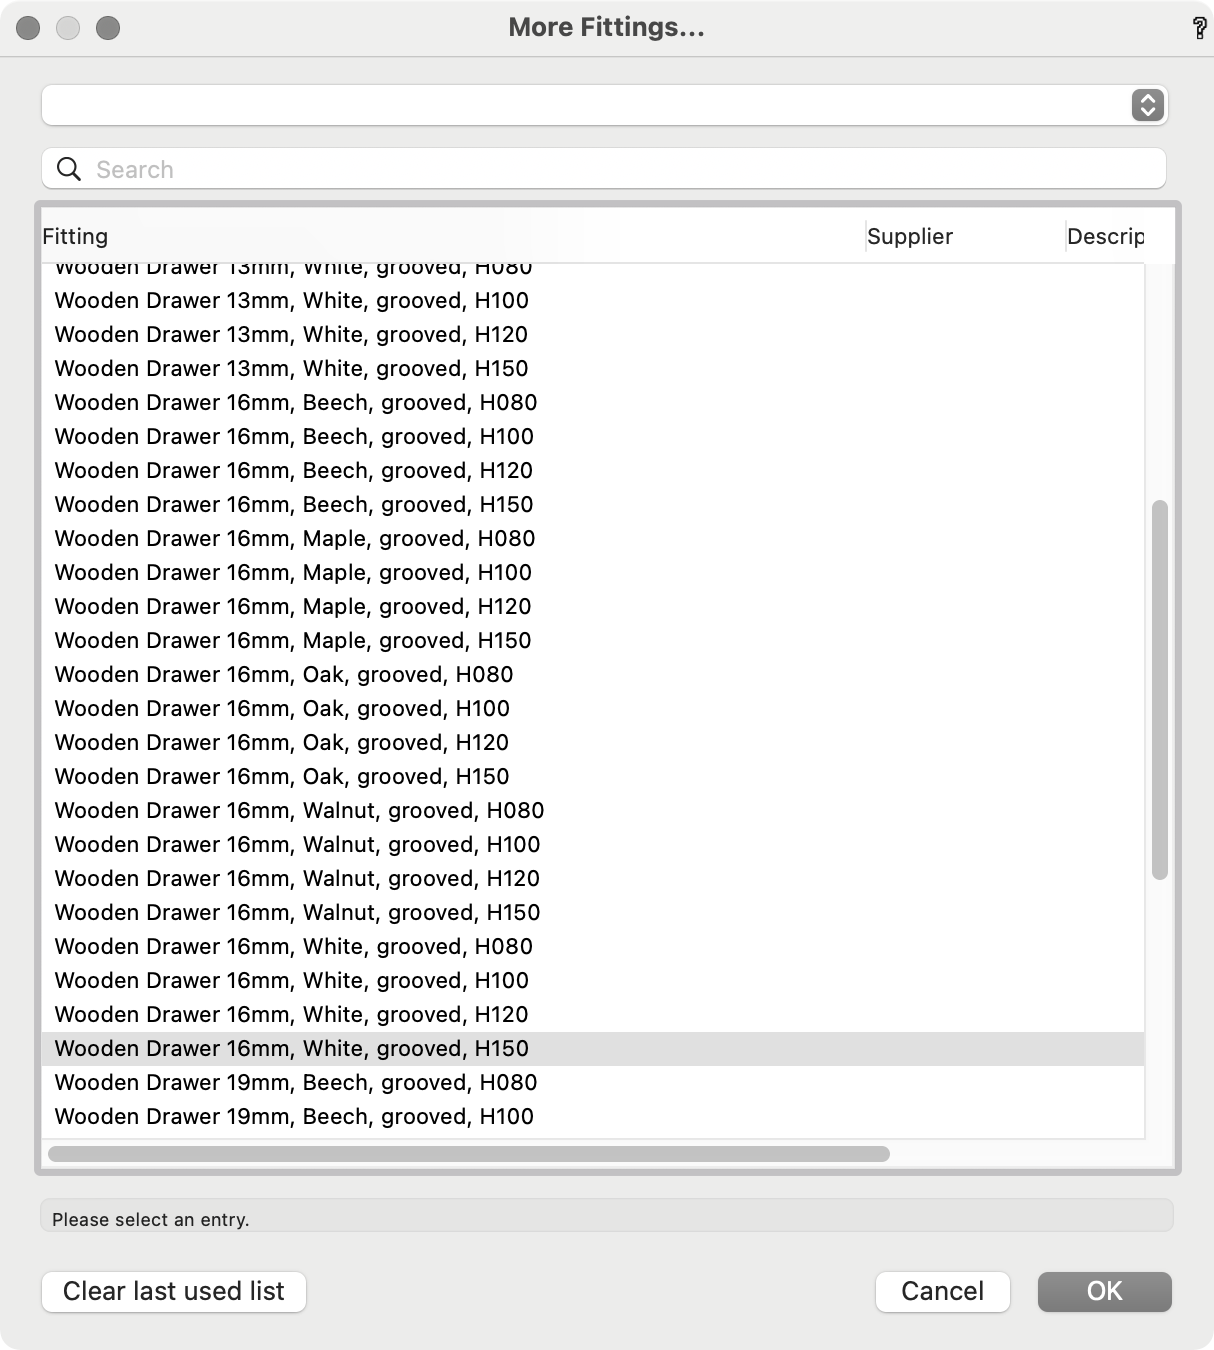
If you can’t find out what is happening, try with a standard interiorcad drawer box first. You can find these when you click the “More…”-item in the select menu:
I can’t see the interiorcad features
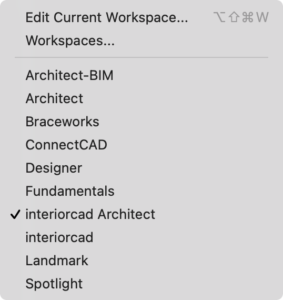
After running the installer you have to choose the right workspace. Go to the main menu under Tools → Workspaces and, depending on which version of Vectorworks you are using, you can either choose interiorcad or interiorcad Architect.
Does interiorcad / interior xs run on older versions of Vectorworks?
interiorcad assumes the latest available version of Vectorworks to run. We usually ship an updated interiorcad version 6 weeks after the official release of Vectorworks in the US. If you have an older version, you should be able to update to the current version. We strongly recommend you to get on board with Vectorworks Service Select to stay on top of things and benefit from the improvements and new features that come with each update.